Currently Empty: $0.00
How to Setup a Professional Email Address with Gmail and G Suite
November 20, 2020
Once you have created a website, the first thing you need to do is to make a professional email address for your business.
Table of Contents
A professional email address can help you build trust when you are dealing with your clients and business owners.
G Suite is Google’s productivity suite. It helps you to use Gmail with your professional email address. In this article, we will show how you can set up a professional email address with Gmail and G Suite.
Setting Up A Professional Email Address
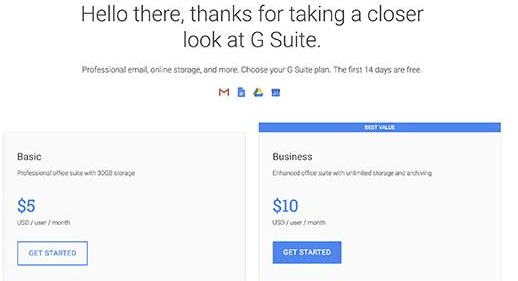
The first you need is to sign up for a G Suite account. It will cost each user around $5 per month. And if you pay annually, you will get two months free, and will cost you around $50 per year.
G Suite also offers a 14-day free trial so you can check everything before you end up buying it. G Suite allows powerful features which you are used to from Drive, Gmail, Calendar, etc (with the exception that it is not for business).
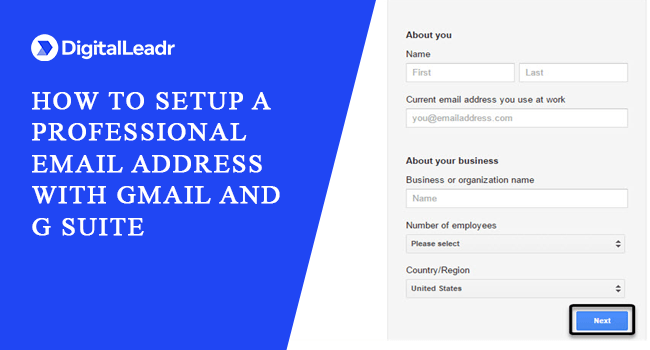
To get started, visit the G Suite website. Click on the Get Started button to choose the plan you want to use.
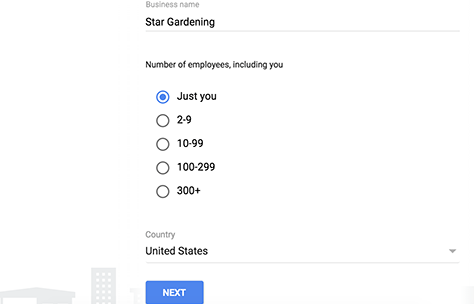
Enter your business name, the country where you are located, and the number of employees. You have the option to choose only one user account or choose the number of employees.
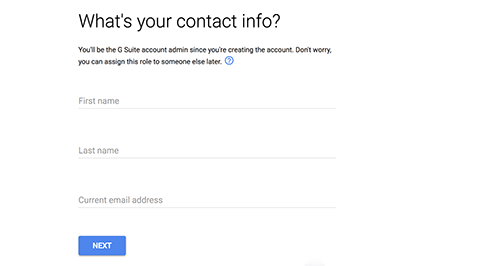
Click next, and enter your personal contact information filling all the required fields.
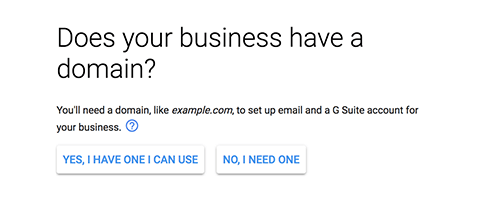
Now, choose a domain name. Click “yes I have one I can use” or click “no, I need one” to register your domain name.
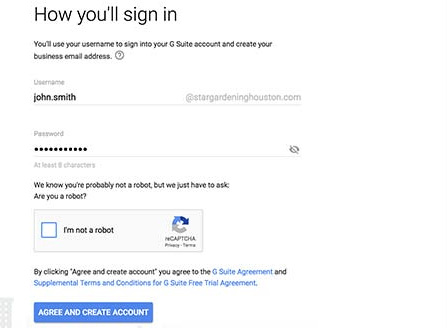
After that, create your G Suite user account and enter your name and password. Choose an appropriate username as it will be displayed as your professional email address.
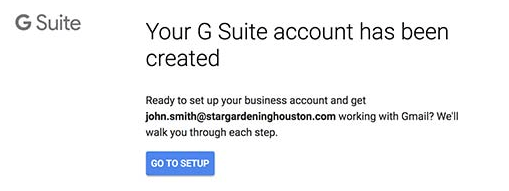
Congratulations! You have successfully created your G Suite account. Now, click on the Setup button.
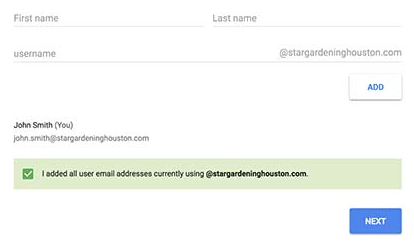
You can add more people to your account. You will be asked for that on the setup screen. Or click on ‘I have added all user email addresses’. Now click on the Next button. You can add more users anytime if needed.
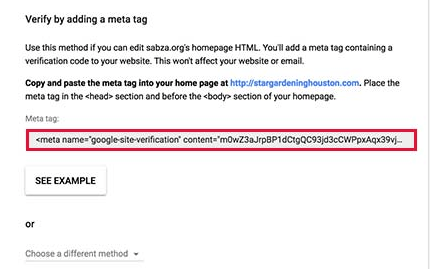
You will need to verify the ownership of your domain name if you have registered the domain name elsewhere. After that, you will need to add an HTML code snippet which will be seen on the screen.
Once activated, go to Settings > Insert Headers and Footer page and paste that code you copied from G Suite in the Scripts in the Header section.
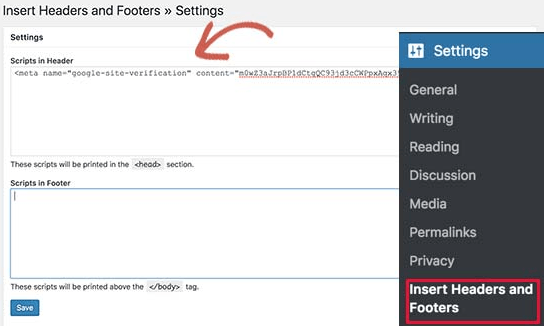
Do not forget to hit the Save button. Now get back to your G Suite setup screen and click on the checkbox saying ‘I added the meta tag to my homepage’.
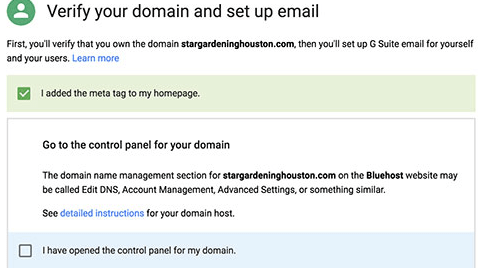
You will be asked to enter an MX record if you have an existing domain and website. Make sure to set up the right MX records on your domain name settings. This will help Google’s servers to send and receive emails for your business.
Wrapping Up
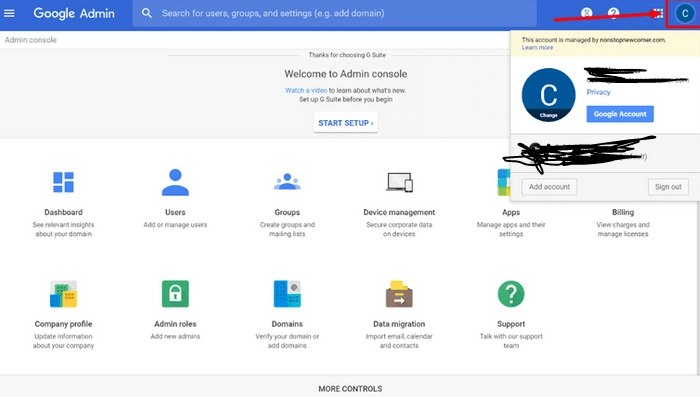
Now that you have set up your G Suite and your professional email address, it is time to switch to it. You can do that by clicking on the icon at the top-right corner. You want to manage your G Suite account like managing apps and adding users, you can do that from your G Suite Admin Console.