Currently Empty: $0.00

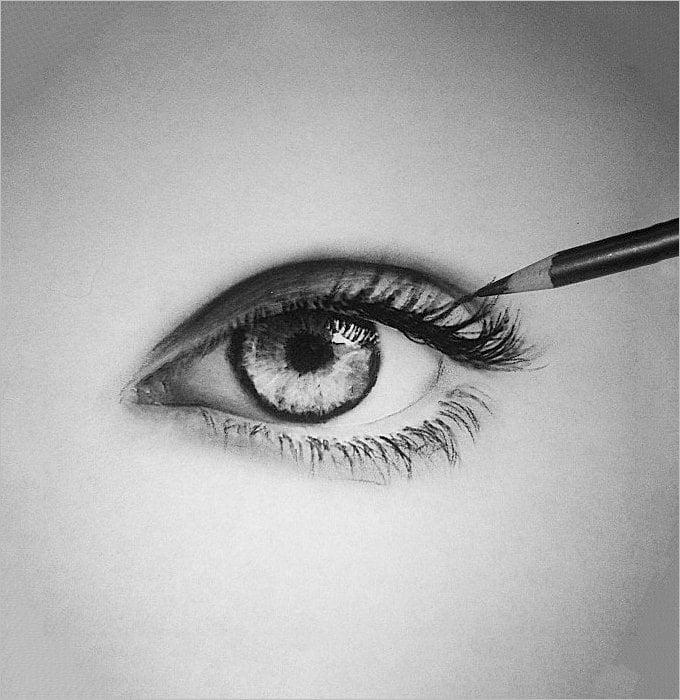
Are you an aspiring artist looking to master the art of drawing eyes? Whether you’re a beginner or an experienced artist, creating captivating eye sketches can be a rewarding and enjoyable creative pursuit. Eyes are often considered the window to the soul, and capturing their essence on paper can be a truly mesmerizing experience.
Table of Contents
In this comprehensive guide, we’ll walk you through the steps to create eye drawing sketches that will leave a lasting impression. From understanding the anatomy of the eye to mastering shading techniques, we’ve got you covered. So, let’s dive right in!
Table of Contents
- Introduction
- Understanding Eye Anatomy
- Gathering Your Art Supplies
- Step-by-Step Guide to Drawing Eyes
- Sketching the Basic Eye Shape
- Adding Details and Highlights
- Mastering Eyelashes and Eyebrows
- Creating Realistic Irises
- Perfecting the Pupil
- Adding Depth and Shading
- Bringing Emotion to Your Eye Sketches
- Tips for Achieving Realism
- Practice Makes Perfect
- Conclusion
- FAQs
Introduction
Drawing eyes can be both challenging and rewarding. Whether you aim to create lifelike portraits or explore your artistic abilities, eye drawing sketches are a fantastic starting point. In this guide, we will provide you with the knowledge and techniques you need to excel in this art form. So, grab your sketchbook and pencils, and let’s get started!
Understanding Eye Anatomy
Before you start sketching, it’s crucial to understand the basic anatomy of the eye. The eye is a complex structure with various parts, including the cornea, iris, pupil, and sclera. Familiarizing yourself with these components will help you create more accurate and realistic eye drawings.
Gathering Your Art Supplies
To embark on your eye drawing journey, you’ll need the right tools. Here’s a list of essential art supplies to get you started:
- Pencils of varying hardness (2H to 6B)
- High-quality sketch paper or a sketchbook
- Erasers (both kneaded and vinyl)
- Blending tools (tortillons or blending stumps)
- Reference images of eyes for inspiration
Step-by-Step Guide to Drawing Eyes
Sketching the Basic Eye Shape
Begin by lightly sketching the basic outline of the eye. Pay attention to the shape and size, as they can convey different emotions. For example, larger, rounder eyes may appear more innocent, while narrower, almond-shaped eyes can seem more mysterious.
Adding Details and Highlights
Next, start adding details to your eye drawing. Focus on the eyelids, creases, and the area around the eye. Use lighter strokes for areas that catch the most light, such as the brow bone and the lower eyelid.
Mastering Eyelashes and Eyebrows
Eyelashes and eyebrows play a significant role in the overall appearance of the eye. Use fine lines to draw individual eyelashes, and pay attention to their length and thickness. Similarly, add texture to the eyebrows to make them look natural.
Creating Realistic Irises
The iris is often the most captivating part of an eye. To make it look realistic, study the intricate patterns and colors in reference images. Remember that irises are not perfectly round; they have subtle irregularities that add character.
Perfecting the Pupil
The pupil represents the most shadowed area within the eye. Use a soft pencil to shade it in and create a sense of depth. Make sure the pupil is centered within the iris to maintain symmetry.
Adding Depth and Shading
To make your eye drawing sketch truly stand out, you must master shading techniques. Practice using different pencil grades to achieve varying levels of darkness and lightness. Pay attention to the direction of the light source and use shading to create depth and dimension in your drawing.
Bringing Emotion to Your Eye Sketches
Eyes are incredibly expressive and can convey a wide range of emotions. Experiment with different shapes, sizes, and expressions to capture the mood you desire in your sketches. Subtle changes in the eyebrows and eyelids can make a significant difference.
Tips for Achieving Realism
- Use a Grid: Consider using a grid technique to ensure accurate proportions and symmetry in your eye drawings.
- Study Real Eyes: Continuously study real eyes, both in person and through reference images, to refine your skills.
- Practice, Practice, Practice: Like any art form, practice is essential. Dedicate time to sketching eyes regularly to improve your technique.
Practice Makes Perfect
Remember that becoming proficient at drawing eyes, like any skill, takes time and practice. Don’t be discouraged by initial setbacks. Keep refining your techniques and experimenting with different styles to find your unique artistic voice.
Conclusion
Drawing eyes can be a deeply satisfying and creative endeavor. By following the steps and tips outlined in this guide, you can improve your eye drawing sketch skills and create captivating artwork that reflects the depth and beauty of the human eye.
FAQs
Q1: Can I use colored pencils for eye drawing sketches?
Yes, colored pencils can be a great choice for adding vibrant and realistic colors to your eye sketches.
Q2: How long does it take to master eye drawing?
The time it takes to master eye drawing varies from person to person. Consistent practice and dedication are key to improvement.
Q3: Are there any online courses for learning eye drawing?
Certainly! You can find online courses on platforms like Udemy and Skillshare that offer comprehensive lessons on eye drawing techniques.
Q4: Can I use digital tools for eye drawing?
Absolutely! Many artists use digital drawing tablets and software to create stunning eye sketches with precision and ease.

